Making a Jersey Shirt for the First Time? What Beginners Get Wrong & How to Get It Right
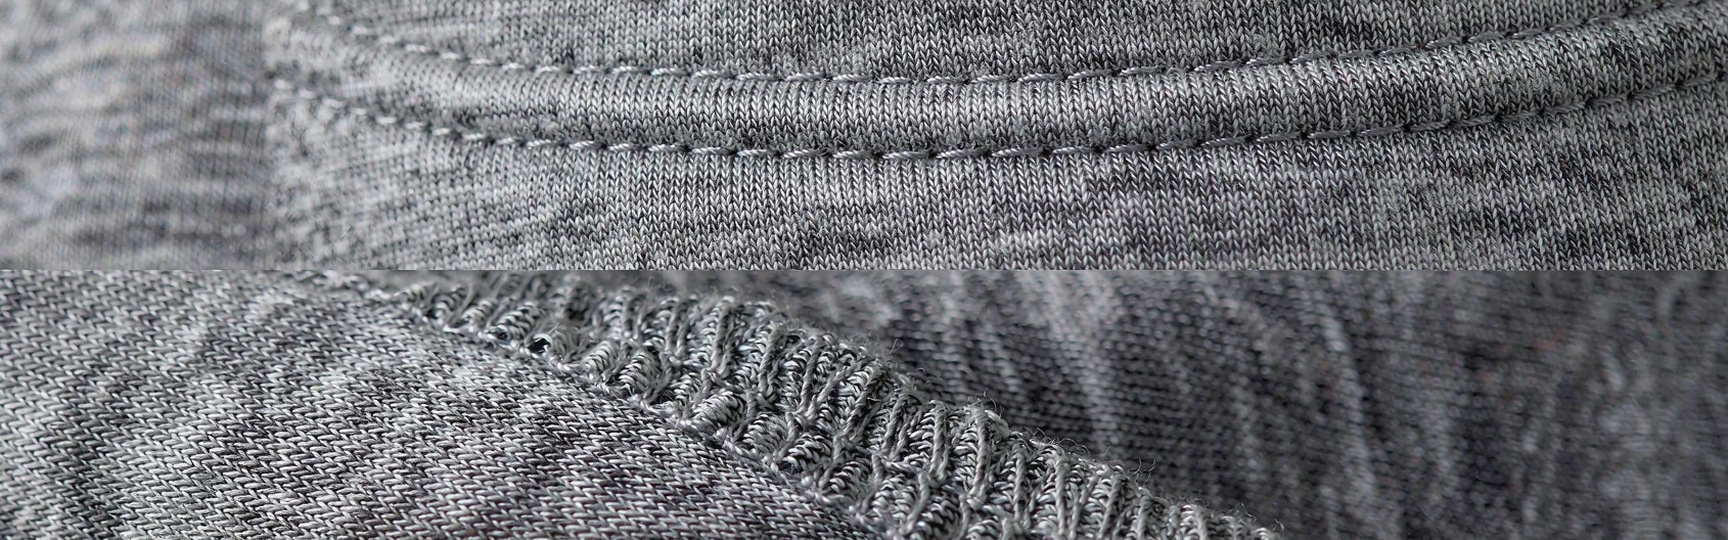
Making a Jersey Shirt for the First Time? Here’s What You Need to Know (And What Most Beginners Get Wrong)
A question that comes up constantly in sewing communities goes something like this: someone is about to sew their first jersey shirt, has a domestic sewing machine but no serger, and wants to know which pattern to use, which fabric to buy, and which stitch will actually hold.
If that sounds familiar, you are not alone. Jersey is one of the most common stumbling blocks for anyone moving from woven to knit fabric. The fabric stretches, the edges curl, seams come out wavy, and a project that should take an afternoon turns into a frustrating mess.
Here is the reassuring part: sewing jersey isn’t hard — it’s just different. Almost every jersey problem traces back to one of four things: the wrong needle, no stretch in the stitch, fabric being pulled through the machine, or an edge finish borrowed from woven sewing that has no business on a knit.
This guide covers all four. It starts with what you need for a first shirt on a domestic machine — and ends with a straight answer on when industrial equipment actually starts to make sense, for those of you moving from sewing for yourself to sewing for other people.
1. Why Is Sewing Jersey Different from Sewing Woven Fabrics?
Jersey is a single-knit fabric: a series of interlocking loops rather than a grid of warp and weft. That structure behaves nothing like cotton poplin or linen.
|
Behavior |
What it means for you |
|
Stretches |
Single jersey stretches considerably more crosswise than lengthwise (four-way stretch knits, with elastane, stretch in both). Your seams have to stretch with the fabric, or they will pop. |
|
Edges curl |
Cut edges roll toward the right side. Annoying to pin — but also a sign of something useful (see below). |
|
Does not fray |
Knit loops don’t unravel the way a woven edge does. You can leave seam allowances raw. This is the single biggest difference from woven sewing, and it means most edge-finishing techniques you may have learned are unnecessary here. |
|
Feeds unevenly |
Jersey stretches as it passes under the presser foot, which is what produces wavy seams. |
Approach jersey like a woven and you will hit problems immediately — not because knits are difficult, but because several woven habits are actively counterproductive on them.
2. What Needles and Thread Should You Use for Jersey?
The wrong needle is the number one cause of skipped stitches, holes, and jammed fabric on jersey.
|
Needle type |
Best for |
Why it matters |
|
Ballpoint |
Cotton jersey and most knits |
The rounded tip pushes between yarns instead of cutting through them |
|
Stretch |
Highly elastic knits, spandex, swimwear |
Specialized scarf and eye geometry that prevents skipped stitches |
|
Universal / sharp |
❌ Not for jersey |
Cuts fibers, leaves holes, skips stitches |
Needle size. For lightweight jersey, start with a 70/10 or 75/11 ballpoint. For heavier jersey or sweatshirting, move up to 80/12 or 90/14. As with wovens, test on a scrap — a needle that is too large punches visible holes that only get worse after washing.
Thread. Polyester or a polyester/cotton blend is the right default. Polyester has enough give to move with the seam and holds up to repeated washing. Cotton thread has very little stretch and is a poor choice for knit construction seams — it is fine for topstitching and repairs, but don’t build a shirt with it.
On an industrial machine the same principle applies, just with a different needle system: DC×27 for overlock machines, 135×17 (DP×17) for lockstitch. Always confirm the system your machine specifies.
3. What Stitch Settings Should You Use on a Regular Sewing Machine?
No serger? That is fine — plenty of wearable jersey garments are made on domestic machines. You just need a stitch with give in it.
|
Stitch |
Settings |
Use it for |
|
Narrow zigzag |
Width 2–3, length 2.5–3.0 mm |
The default for knit seams. Stretches with the fabric without puckering |
|
Built-in overlock / overcast stitch |
As labelled (often “G” or a stretch-overlock icon) |
Closest domestic approximation to a serged seam |
|
Twin needle |
Two needles, straight stitch on top, zigzag underneath |
Hems and sleeve openings — the look you associate with store-bought tees |
|
Triple straight stitch |
Straight stitch worked three times |
Reinforcement only — crotch seams, underarm stress points. It is strong but has little stretch, so keep it off main seams |
Stitch length: 2.5–3.0 mm. Shorter stitches pack too much thread into the seam and cause puckering; longer stitches won’t hold.
Tension: start at your machine’s default and test. If the fabric is being stretched as it feeds, slightly reducing upper tension usually helps. Always test on a scrap of the actual fabric, and stretch the test seam to confirm it recovers.
4. How Do You Prevent Wavy Seams and Puckering?
Wavy seams are the most common complaint about sewing knits, and the cause is nearly always the same: the fabric was stretched while being sewn.
Don’t pull the fabric. Let the feed dogs move it. Your hands guide and support; they do not tug. This one habit fixes more wavy seams than any gadget.
Use a walking foot. A walking foot feeds the top layer in sync with the bottom layer — exactly what stretchy, slippery jersey needs. (On an industrial machine this function is handled by differential feed, which is the feature to look for when you move up — see Section 7.)
Use clips, not pins. Jersey is bulky and pins distort it. Wonder clips or fabric clips hold layers without stretching the edge.
Stabilize where it matters. Shoulder seams are the classic trouble spot: a strip of fusible tape or clear elastic in the shoulder seam stops it stretching out of shape after a few wears.
Press, don’t iron. Pressing straight down avoids dragging the fabric into distortion.
5. How Should You Hem Jersey?
A straight-stitch hem will pop the first time the shirt goes over your head. Hems on knits need stretch.
|
Method |
How it looks |
Best for |
|
Twin needle |
Two parallel rows on top, zigzag underneath |
T-shirt hems and sleeve hems on a domestic machine — the closest you’ll get to retail finish without a coverstitch |
|
Narrow zigzag |
A single zigzag line at the hem |
Quick, functional hems on casual pieces |
|
Coverstitch machine |
The professional double-row hem you see on shop-bought tees |
Anyone making knitwear regularly, especially for sale |
Commercial T-shirts are hemmed on coverstitch machines (a 600-class stitch) — that flat, stretchy double row on the bottom hem and sleeve openings. It is also the hardest finish to fake with a domestic machine, which is why the twin needle is the usual compromise: it looks close, and it stretches enough to work.
6. What If You Don’t Have a Serger?
A serger (overlocker) sews a stretchy seam and trims the edge in one pass. It makes knit construction faster and tidier. It is not, however, required for your first jersey shirt.
What actually works without one:
- Narrow zigzag for construction seams — the workhorse solution
- Twin needle for hems and sleeve openings
- Faux overlock / overcast stitch if your machine has it
- Leave the raw edge alone. Jersey doesn’t fray. On a first project, an unfinished interior seam is a legitimate choice, not a failure.
Two techniques to skip on knits, despite what you may have read:
- French seams — they enclose the raw edge, which is a solution to a problem knits don’t have. The double fold makes the seam thick and stiff and strips out exactly the stretch the garment needs. Knits are on every “do not use French seams” list for this reason.
- Pinking shears — also an anti-fraying tool, also unnecessary, and the serrated edge tends to curl on stretch fabric.
Both are good techniques. Just not here.
7. What Should You Look for in a Machine for Knitwear Production?
If you are moving from making clothes for yourself to making them for other people — regular orders, deadlines, consistent quality — the equipment question changes. You are no longer asking “can I sew this?” but “can I sew this identically, 300 times, by Thursday?”
|
Feature |
Why it matters on knits |
|
Differential feed |
The single most important feature for knit quality. Two independently driven feed stages let you match or deliberately ease the fabric, which is what prevents stretching and puckering |
|
Direct-drive servo motor |
Precise speed control, quieter running, and lower energy draw than a clutch motor |
|
High presser foot lift |
Clears thick seams and multiple layers without dragging |
|
Standard needle system |
DC×27 for overlock, 135×17 for lockstitch — keeps consumables cheap and available |
|
Auto thread trimmer |
Seconds saved per seam, multiplied across a shift |
|
Wide stitch range |
One machine covering both knit construction and woven finishing |
DOIT machines built for knitwear
|
Model |
Type |
Key feature |
Best for |
|
DT 900-4AT |
3/4/5-thread overlock |
Auto trimmer, stepper motor |
T-shirts, knitwear, general garment construction |
|
DT EX5200-4D |
4-thread overlock |
Direct drive, thin to heavy fabrics |
High-volume knitwear production |
|
DT 940-4AT |
4-thread overlock |
Auto trimmer |
Professional edge finishing |
|
DT C9 |
Computerized lockstitch |
Stepper motor, 5,000 spm, 10 stitch patterns |
Precision work on woven and knitted fabrics; topstitching, labels, and stabilized areas |
A note on where the lockstitch fits: a machine like the DT C9 is excellent for topstitching, labels, woven components, and stabilized areas. On knits it is not the machine for structural seams — those belong on the overlock, because a 301 lockstitch has almost no stretch and will pop when the fabric extends.
8. Why Do So Many Beginners Give Up on Knits?
The pattern is familiar: excitement, then confusion, then frustration. Almost every case traces back to something preventable:
- Wrong needle → skipped stitches and holes
- No stretch in the stitch → seams that pop the first time the garment is worn
- Fabric pulled through the machine → wavy seams
- No serger → a belief that “real” knitwear isn’t possible without one (it is)
- Comparing a first project to a store-bought garment → unrealistic expectations
The fix is unglamorous: make a basic tee from a forgiving jersey, use a narrow zigzag, and don’t aim for perfection. Every competent knitwear sewer has a drawer of learning projects. The difference between someone who quits and someone who doesn’t is usually just one finished wearable garment.
9. When Does Moving to Industrial Equipment Actually Make Sense?
Skip the payback-period spreadsheet. The honest test is whether you have hit any of these:
- You are turning down orders, or quoting delivery dates you are not confident about
- Consistency is the problem — the tenth shirt doesn’t match the first
- One operation is your bottleneck — everything piles up at the hemming or seaming station
- You are paying for rework caused by seams that fail or finish inconsistently
- Your domestic machine is running near its duty limit for hours at a time
If two or more apply, industrial equipment stops being an upgrade and starts being the constraint you remove.
What you actually gain, in plain terms:
- Speed — industrial overlock and lockstitch machines run at several thousand stitches per minute against roughly 800–1,200 on a domestic machine
- Duty cycle — designed for continuous eight-hour shifts, not intermittent use
- Consistency — differential feed and auto-trimming remove operator-to-operator variance
- Running cost — direct-drive servo motors draw substantially less energy than conventional clutch motors
For a rough payback estimate, use your own numbers: how many extra units per week could you complete if your bottleneck operation ran three times faster, multiplied by your margin per unit. That figure is far more persuasive to you — and to anyone you show it to — than a generic industry average.
10. The Bottom Line
Your first jersey shirt won’t be perfect. Your second will be noticeably better. By the tenth you will wonder what the problem ever was.
What to remember:
- Needle: ballpoint or stretch — never universal
- Stitch: narrow zigzag, or a built-in overlock stitch. Straight stitch only where the seam doesn’t need to stretch
- Feed: let the machine do it. Don’t pull
- Edges: jersey doesn’t fray. You can leave them raw. Skip French seams and pinking — they are woven solutions
- Hems: twin needle on a domestic machine; coverstitch if you’re making knitwear regularly
- A serger helps, but isn’t required for a first project
- When orders, deadlines, and consistency start to bite, that is the moment industrial equipment pays for itself
Ready to take your knitwear further? Explore DOIT Group’s range of industrial sewing machines — overlock machines for knit construction, coverstitch and interlock for hems, and computerized lockstitch machines for precision work — at doitsewingmachine.com.
📩 Email: sales6@chinadoit.cn 🌐 Website: doitsewingmachine.com
The Seamstress Who Built an Empire from a Wheelchair: What Margarete Steiff Teaches Us About Innovation, Resilience, and the Right Equipment